INSTALLING THE BILLBOARD
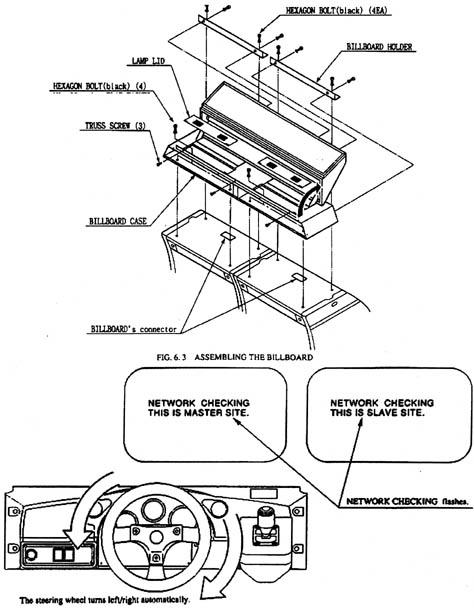
Take out the three truss screws, open the Billboard upper andremove the 2 lamp lids.
Mount the billboard over the 2 cabinets and secure with the4 hex bolts. When fastening the bolts, be careful of the lampposition. If it is too difficult to perform the work with thelamps in place, remove them temporarily.
Connect 3 connectors which are inside the billboard case.
Attach the two billboard holders to the backside of the billboardcase by securing with 4 hexagon bolts for each.
CONNECTING THE POWER SUPPLY
Connect the game to the power supply and turn on power to thegame.
POWER ON
Turning the AC unit's main switch on will cause the machineto start the power on check and network check automatically.
In the Power On check, the steering wheel turns left and right,and then returns to the centering position and stops. In thischeck, the values of the VR inside the control panel are corrected.
Until the check is finished, and the steering wheel stops,do not touch the steering wheel or play the game. If you do, thesteering reaction during the game (reaction at the time of a course-outor crash) can not be obtained correctly.
In the case of an abnormal reaction during the game, turn thepower on again from the beginning and complete the power-on check.
During Network checking, "NETWORK CHECKING" flasheson the screen. When network checking is finished, the demo modewill appear on the monitor screen. After 10 seconds, if the networkcheck is not finished, check the communications connections.