6 - 11 GUN SETTING
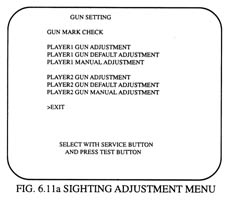
Selecting GUN SETTING causes the folowing screen at the top to appear.This allows the controller sighting to be adjusted. Periodically check thesighting adjustment status on this screen.

The screen shown at the left is the sighting adjustmentmenu mode. Press the SERVICE BUTTON to bring the arrow to the desired adjustmentitem to select. Press the TEST BUTTON to cause the following sighting checkto appear. There are 2 types of adjustments, i.e., one for 1 P side andone for 2P side. Adjustments for both 1 P and 2P can not be made on thesame screen. To return to the Main Menu bring the arrow to EXIT and pressTEST BUTTON. (Fig. 6.2)

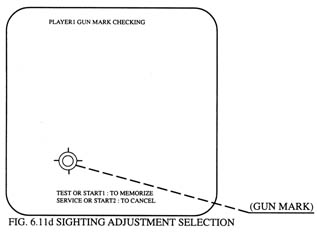
Selecting GUN MARK causes the screen at the left to appear.Point the controller at this screen to have an impact mark appear on thescreen. The position of the mark shows the impact point shot by the controller.A red impact mark applies to the left 1P side and a blue impact mark appliesto the right 2P side. Perform the TEST BUTTON to return to the above sightingadjustment menu screen.

Selecting PLAYER 1 GUN ADJUSTMENT causes the screen shownat the left to be displayed. 1P side sighting adjustment menu returns tothe screen without performing anything. Adjustment procedure: First shootat the center of grid (the square mark at the upper left portion of thescreen). This causes another grid to appear at the lower right portion ofthe screen. Shoot at this grid also.

Shooting the 2 grid displays "NOW CALCULATING"pon the center of the screen to allow sighting to be adjusted. Next, thegun mark checking screen shown left appears. When the controller is pointedto the screen, the gun mark is shown onthe screen. The mark position showsthe gunshot. If this adjustment is satisfactory, press either the TEST BUTTONor 1P side START BUTTON. When readjusting, press either the SERVICE BUTTONor 2P side START BUTTON.

Choosing PLAYER 1 GUN DEFAULT ADJUSTMENT causes the screenshown at left to be displayed. The sighting is reset to the initial settingmade at the time of shipment from the factory. However, due to some changesin the unit's enviroment and cabinet after shipment, sighting may not alwaysbe accurate. To reset to the initial setting, press the TEST BUTTON or 1Pside START BUTTON. To return to the sighting adjustment menu without doinganything, press the SERVICE BUTTON or 2P START BUTTON.
Select PLAYER 1 GUN MANUAL ADJUSTMENT to cause the screenshown at the left to be displayed. In this screen, the 4 adjustment valuescan be set. Use this adjustment mode only when accurate sighting can notbe achieved in the above 2 screens. When setting each of the 4 adjustmentvalues, follow the procedure below: Be sure to shoot at the screen's endportion in the designated direction and determine the adjustment value bypayng attention to the impact mark movement.