 ASSEMBLING THE COCKPIT
ASSEMBLY AND PRECAUTIONS
Assembly should be performed as per this manual. This is acomplex machine, and erroneous assembly can result in malfunctioningor damage to the machine.
When assembling this machine, be sure that 2 or more personsare available to perform the work. Attempting to assemble themachine alone can cause personal injury and damage to the game.
When carrying out the assembly work, follow the procedure inthe following sequence:
1 ASSEMBLING THE COCKPIT
2 SECURING IN PLACE/LEG ADJUSTERS
3 INSTALLING THE BILLBOARD
4 INSTALLING THE AC COVERS
5 CONNECTING POWER SUPPLY
6 TURNING ON POWER
7 ASSEMBLY CHECKS
Note that the master key, and cash box key are required, inaddition to tools such as a phillips head screwdriver, wrenchfor M16 hex bolt and socket wrench to perform the assembly work.
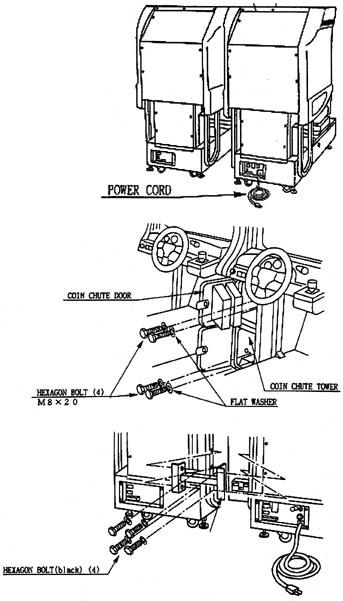
ASSEMBLING THE COCKPIT
Place the two cockpits side by side. Position the 1P cabinet,which has the power cord at the left hand side, as shown in thediagram.
Install the coin chute tower in between the two cabinets. Openthe coin chute door and the cashbox door to secure with the 4hex bolts from inside the doors. At this time, make sure the boltsare fastened temporarily.
Install the joint pipe on the back side of both cabinets bysecuring temporarily with 4 hex bolts.