[Previous Page] [Next Page] [Table of Contents]
6 - 6 C.R.T. TEST

Select C.R.T. TEST to cause the MONITOR to display the screen shown left, allowing MONITOR adjustment staus to be checked.
Periodically check the MONITOR adjustment status on this screen.
The screen (1/2) enables color adjustment check to be performed. THe color bar of each of the 4 colors, i.e., red, green, blue, and white, is the darkest at the extreme left and becomes brighter towards the extreme right.
Press the TEST BUTTON to shift to the next page (2/2).
The scren (2/2) allows screen size and distortion to be tested.
Check if the CROSSHATCH FRAME LINE goes out of the screen and if the crosshatch lines are distorted.
Press the TEST BUTTON to return to the MENU mode.
6 - 7 OUTPUT TEST
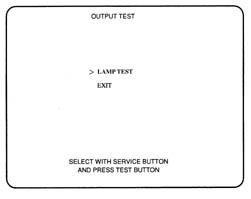
Choose OUTPUT TEST to cause the following lower screen to appear. In the test, periodically adjust the projector and check the status of each lamp.

Choose OUTPUT TEST to have the MONITOR screen shown left to appear. This screen allows status to be checked. Periodically check the lamp status in this mode.
Press the SERVICE BUTTON to move the arrow to the desired lamp test item.
Press the TEST BUTTON. If the dispay to the right of the lamp changes to ON from OFF, the lamp and wiring connection are satisfactory.
Choose EXIT and press the TEST BUTTON to return to MENU MODE.