GAME SYSTEM SETTINGS
For each linked cabinet, press the Test Button on the Service
Panel and modify the Network Assignments menu as shown below.
When changing settings, refer to the Test Mode section.
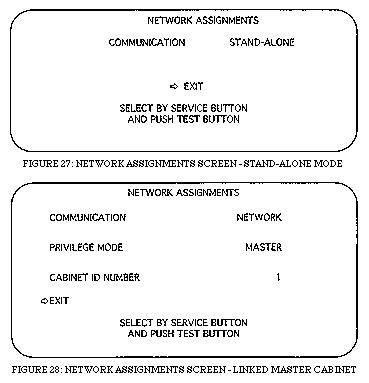
- Press the Test Button to enter the Test menu and choose NETWORK
ASSIGNMENTS (see Figure 27).
- Bring the cursor => to COMMUNICATION and press the Test
Button to select NETWORK (see Figure 28).
- Move the cursor => to PRIVILEGE MODE and press the Test
Button to allow one of the cabinets to be set to MASTER. Set
all other cabinets to SLAVE.
- Bring the cursor => to CABINET ID NUMBER, press the Test
Button, and set the machine numbers sequentially ( I, 2, 3, ...
8) as applicable, starting from the extreme left cabinet, facing
the front of the monitors (matching the seat numbers). If the
same number is set for two or more cabinets, or if the sequential
order is incorrect, the game display will be confused.
- In the case of linked play, the Game Assignments settings
are made on the MASTER cabinet. Even if the settings are changed
on the SLAVE machines, the settings will not be effective. Changing
the settings on the MASTER cabinet causes all of the SLAVE machines
to change the to MASTER unit's settings.
- All linked machines perform a NETWORK CHECK (see Figure 29)
when the power is turned on, and when exiting the Test Menu.
Linked play is not possible unless all of the linked machines
simultaneously perform a NETWORK CHECK. Should testing become
necessary for one machine, all of the remaining machines will
be tested. When testing is finished for the machine which required
testing, all of the machines will exit from the Test Menu at
the same time.


